Hey everyone, it’s time to update you on our current project!
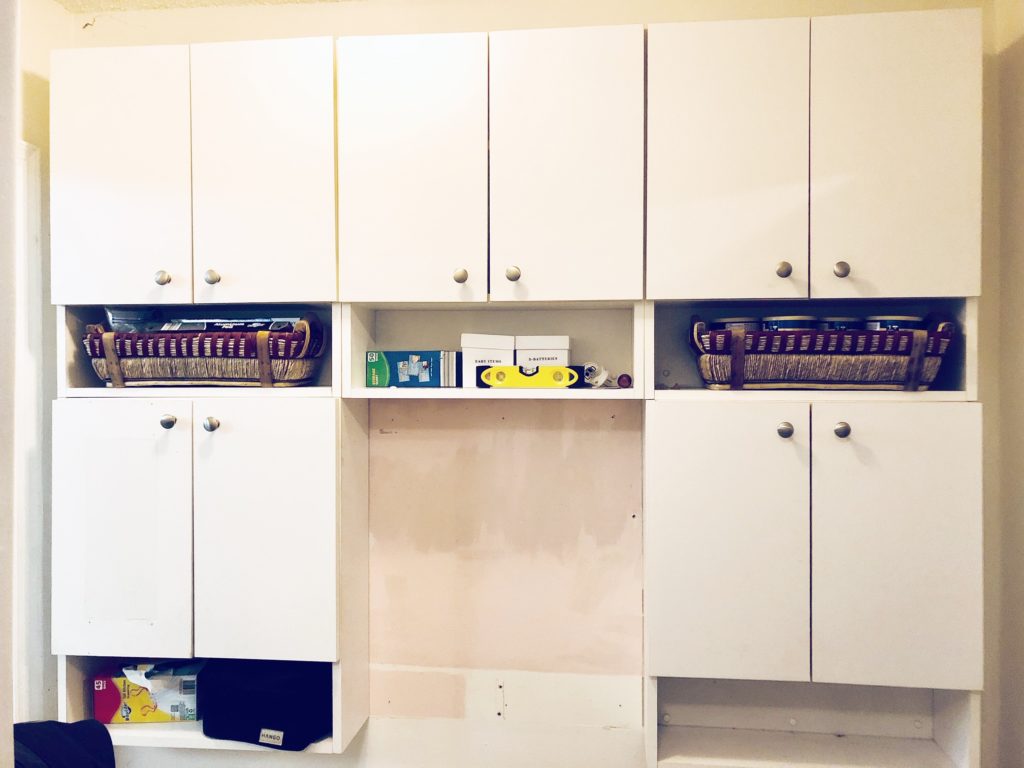
Since all the cabinets in our kitchen and laundry room are shaker style, we’ve decided it was time to update our pantry area to match the rest of the doors. We’ve been wanting to do this for a while now but just kept putting it off. In the picture below, the cabinets are your standard 80’s Formica cabinets.
 There was an empty space between the cabinets so we decided to fill the area with a wood frame we built from scratch.
constructing the frame was simple, we just took the dimensions of the frame next door and replicated it.

We are thinking about keeping the grain as is to add an element of surprise. We will wait until the project is done to see if we like the idea.
We could have probably bought new cabinets or custom doors in our hallway pantry, but I didn’t think it was necessary. These cabinets are situated in the hallway and no one really walks in that area much, except to go into the laundry room or garage. Why spend hundreds of dollars to put new cabinets in a space that no one really sees especially when we can easily do this project for less than $80 by adding trim and painting the cabinet.

The first thing we had to decide was how are we going to construct the trim. We did a similar project for our kitchen in the past and bought individual wood trim online. It got a bit pricey so we decided to have our local big box store cut a sheet of 1/4″ plywood into 2.5″ strips for a fraction of the cost. In addition to that, we bought wood filler and clamps. I know the proper way of adding trim is to glue and nail it to the door, but we did things differently by just gluing the trim to the cabinets without nailing it down. The worst case scenario is to nail the trim if it detaches from the cabinet.
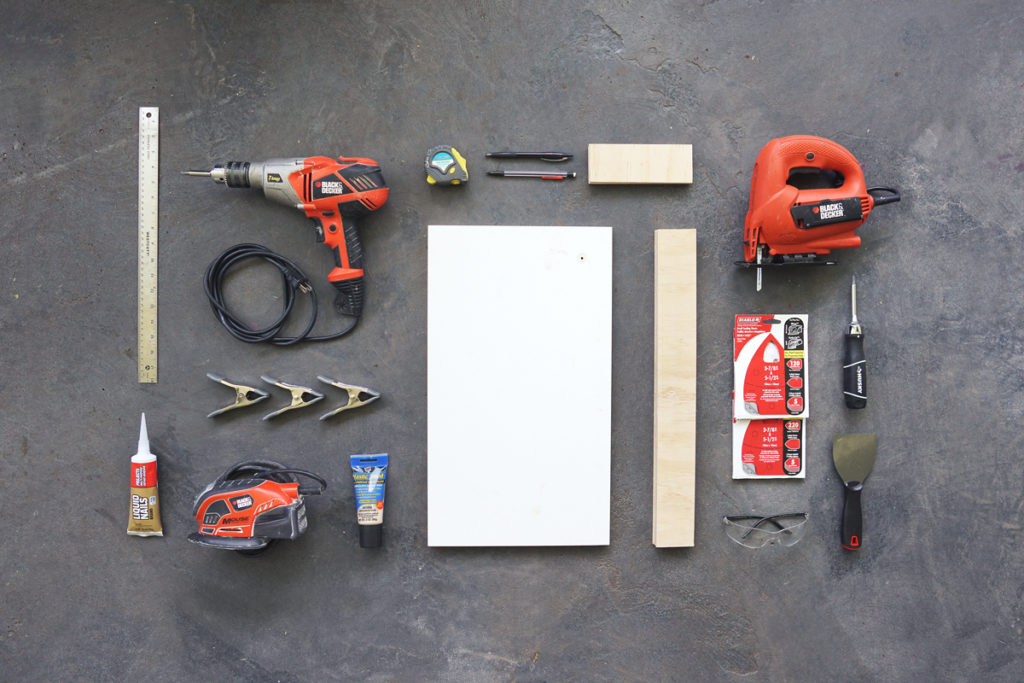
All the other tools for this project we had on hand. We have our ruler, jigsaw, sander, and safety glasses. So it was just a matter of measuring, cutting, and gluing. My husband started with one door and we finished the rest of the doors that weekend. It took us less than 2 hours to do 10 doors. He measured and cut while I sanded, glued and clamped. It was like an assembly line.

We had other obligations that day, so we let the cabinets do it’s thing and made sure the clamps held the trim in place for at least 48 hours. To smooth out the imperfections on the plywood, we added a bit of wood filler and sanded the area.
Please look out for part 2 of this post. I’m hoping we won’t drag this project out because this month will be busy for us due to birthday parties and church activities!