We have another easy DIY transformation for you. And of course, you know we have to keep it budget-friendly. When we purchased this property, pretty much all the bathrooms were in rough shape except for the master bathroom. Even the master bathroom is not as good as I would like – but it’s doable. The half bathroom functioned well, but it was just plain old ugly. Take a look below.

As you can see the caulk was black, the doors were warped, and the whole thing just looked like it was stuck in the ’80s. I thought about replacing the whole cabinet, but I knew it would open up a can of worms because I don’t think I would find the right vanity size for this space and I was not sure if the tile went under the vanity. Instead, we decided to keep all we had and just remove the counter and sink and replace the cabinet doors.

The interior of the cabinet was also warped in some areas, so we lined it with PVC sheets. I talk about how we use PVC sheets here. We made sure it was water tight.


Now for the countertop installation. We used a discounted laminate countertop from Ikea that cost us about $44. It’s the same countertop we used for our wet bar and guest bathroom.

Usually, when you purchase a sink, the manufacturer provides a template of how the sink is to be cut out, we didn’t have one so we improvised. We just traced the sink base and proceeded to cut with a jigsaw after drilling holes on each corner.


Perfect fit.

Then all that was left was adding the faucet and light fixtures.


We also added shelves to the back wall for additional storage.

Let’s take a look at the befores and after.
Before:

After:
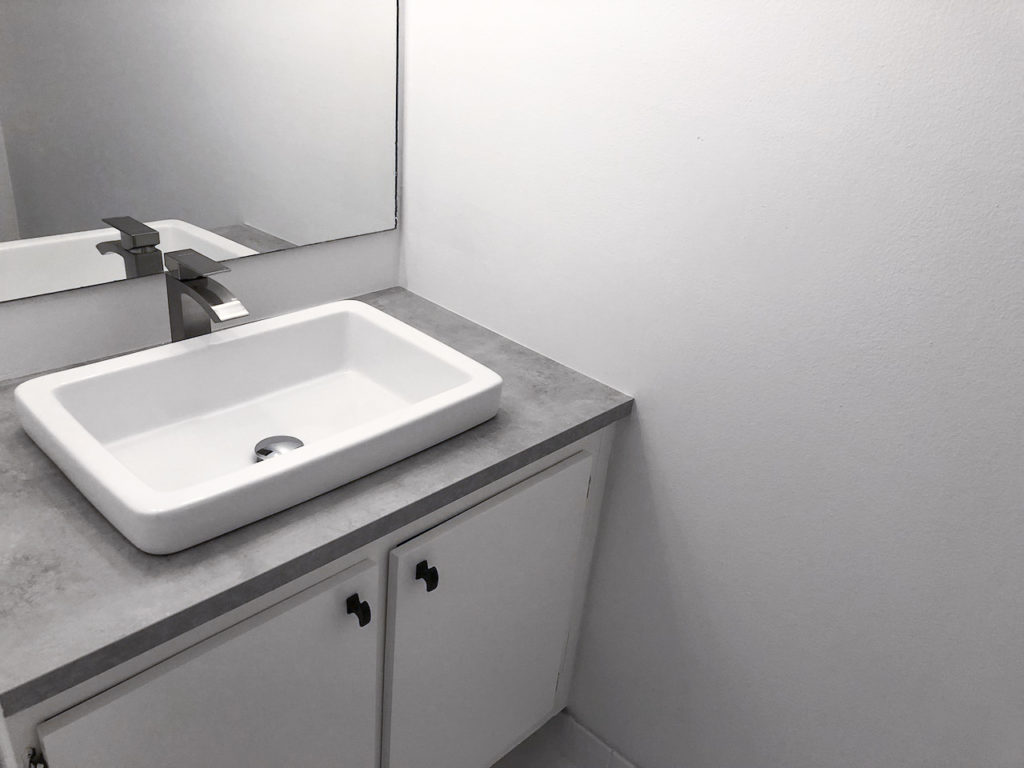


The most expensive item for this makeover was the sink which was $99. The whole makeover was less than $200. We could have gotten a less expensive sink of course but we wanted something a bit modern and rectangular.
That’s it. Using basic tools and having some handy skills afforded us this project. If we had all the materials present when tackling this project, it would take a weekend.
Until next time…
SO simple and beautiful!
Thank you Manoushca!